Controller configurations
You can personalize the joystick controls or configure the command shortcuts with the keyboard.
Click on the icon  at the top of the interface to open the menu.
Detected controllers appear in green. If your controller does not appear, check the USB connection and click on  .
.
If you notice that the joystick control “trembles” or responds strangely, launch a calibration (CALIBRATE JOYSTICK) or modify the DEAD ZONE (value range not taken into account).
You also have the following options:
The greyed out options below are reserved for expert users
- Enable Keyboard if window minimized: This option is useful when you operate the system with a mouse and you have other Windows tabs open than multiCAM. This option is very dangerous! (For example when typing a text with shortcut keys)
- Enable Preset Recall Turbo mode: After a preset recall, the multiCAM system waits for feedback from the camera to validate its condition. In Turbo mode, it immediately hands back to the user. However, the inconsistencies in its condition can appear after the removal of this control phase. Equally, it may be that the camera has not had the time to finish its recall (for example the background is still blurry). To be used for important reactivity needs.
- Allow Preset Recall on Live Camera: It is advised to not activate this option in order to avoid errors such as preset recalling on an on line camera, which could result in the sudden change to the ariel.
- Allow Control on Live Camera: For beginners, it may be wise to deactivate this option, allowing you to train yourself on versatile controls before taking the risk of doing it with an on line camera.
- Enable Virtual Joystick: This option is designed more for troubleshooting. It allows you to control the camera via a virtual control, which is situated in the module options in the lower right-hand side of the interface.
On the right-hand side, you will find a group on functions for which you can personalize the control.
Click on  to designate a button. Click on
  to release control.
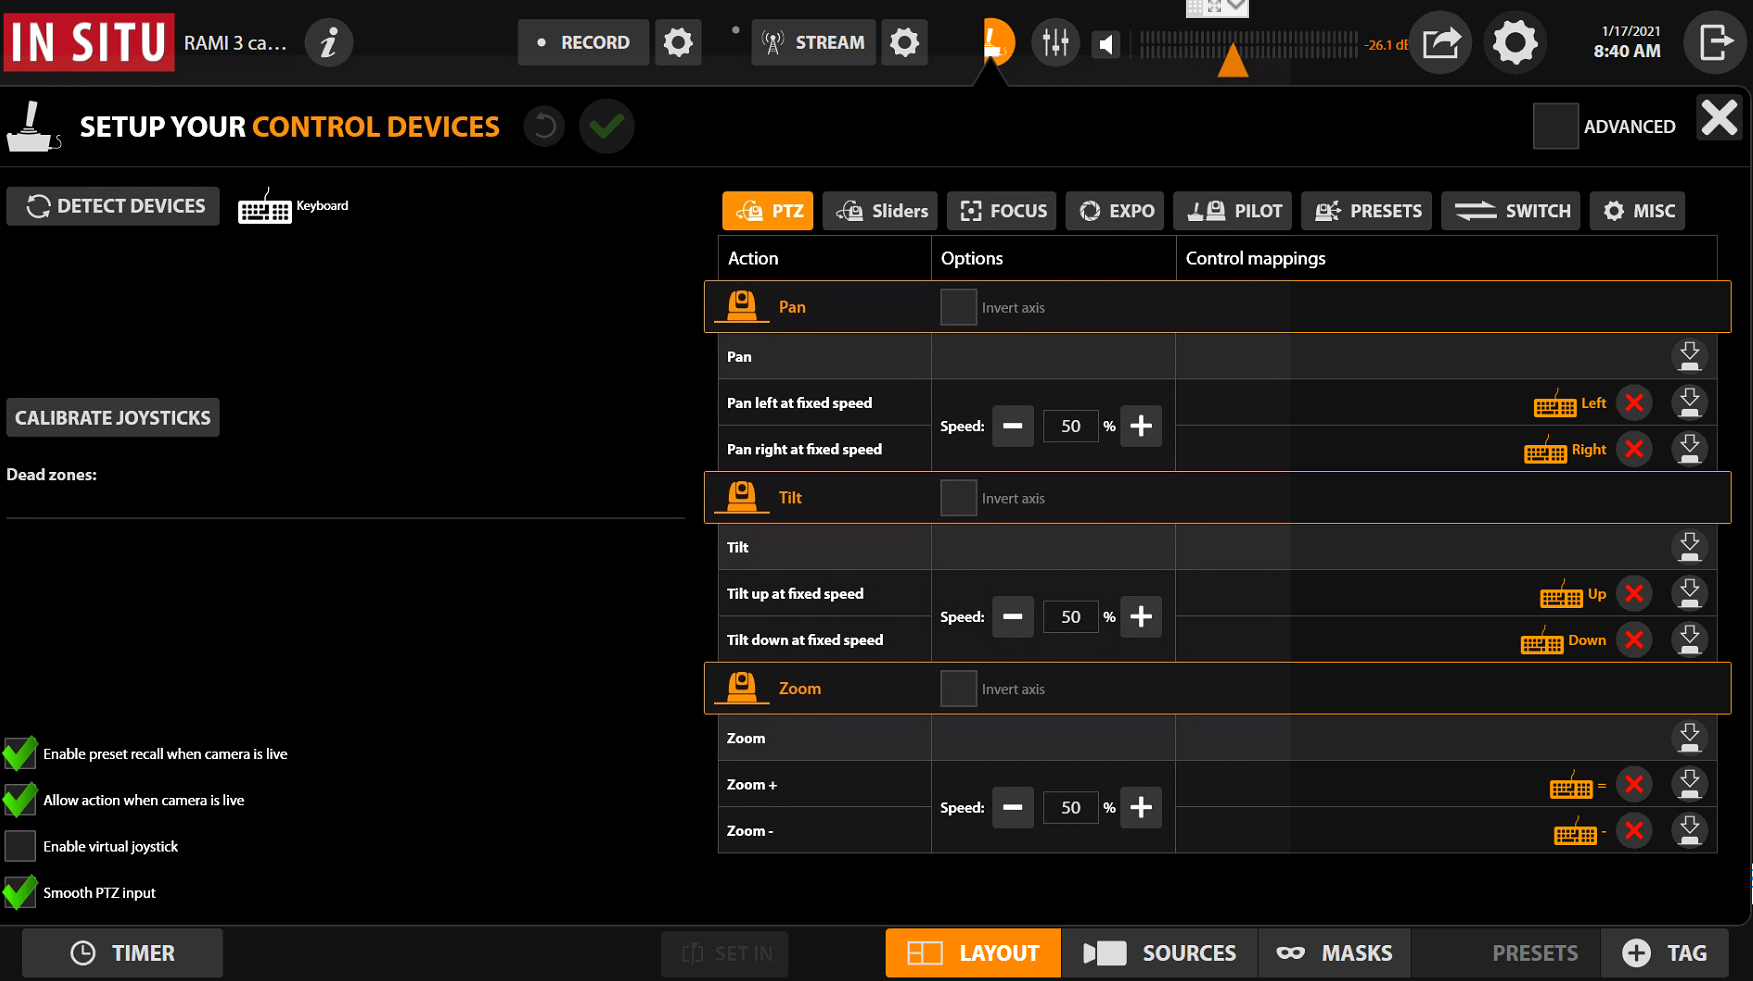
PTZ
These controls are reserved for turret cameras.
-
PAN: This is the horizontal movement of a camera. Click on the allocated button tto move the joystick handle. You can invert the control axis to match your requirements. By default, you must pull on the handle to go up.
-
PAN LEFT/RIGHT: You can take a panoramic shot in one direction (left or right) from an assigned button. You choose the travelling speed. This function allows you to take a slow and controlled panoramic shot with just one touch of a button.
-
TILT: The same control as PAN for vertical movements.
-
TILT UP/DOWN: Carry out a vertical movement with one touch.
-
ZOOM: The zoom control is carried out by turning the joystick handle. By default, you must turn clockwise to zoom in, and vice versa.
-
ZOOM IN/OUT: Zoom in or out with just one touch.
-
SLOW/NORMAL SPEED: This allows you to put the joystick control in “slow” mode in order to carry out smoother and more controlled movements. This option is particularly recommended for beginners.
FOCUS
These controls are reserved for turret cameras.
- MAN/AUTO: In order to switch between automatic focus and manual focus.
- NEAR/FAR: To change the focus point to be closer or further away.
- ONE PUSH: To fix the focus to a certain automatically determined value in the frame.
EXPOSURE
These controls are reserved for turret cameras. They can vary according to the model.
- MAN/AUTO: To switch between automatic and manual exposure.
- SHUTTER +/-: (Control available if the camera is in manual exposure mode) To modify the shutter speed. The weaker it is, the more light you gain. Attention: too weak a value will result in blurring. Please combine with the Iris.
- IRIS +/-: (Control available if the camera is in manual exposure mode) To modify the opening of the sensor and consequently the light sensitivity (just as the human eye adapts to high or low lights). Please combine with the shutter for the best results.
- GAIN +/-: (Control available if camera is in manual exposure mode) The gain is an additional digital processing in order to increase or reduce light. Attention: beyond 3dB, your image will become noisy and of a lower quality.
- BRIGHTNESS: (Control available if the camera is in automatic exposure mode) This adjustment is an intelligent combination of light control by playing with 3 settings: Iris, Shutter, Gain.
CAM PILOT
These controls are reserved for turret cameras.
- CAM PILOT (1 to 4): To select a particular camera to control.
- PRESETS: These controls are reserved for turret cameras.
- RECALL (1 to 6): To recall a particular preset from a selected camera for navigating.
- RECALL ALL (1 to 6): To recall a particular preset for all cameras, with the exception of the one currently on line. This function is very interesting, for example for a sports recording to follow a game set up (for example in attack or defense).
SWITCH
- CAM (1 to 4): To put a particular camera on line
- PC INPUT: To put the computer input online (DVI input)
- MEDIALIST: To put an element selected in the medialist online
- TITLE TAKE: To put and element of selected titling on line (or take it off line)
- TITLE UNTAKE ALL: To remove any title element which does not appear on line
- COMPO TAKE: To put a selected composition on line (or take it off line)
- COMPO UNTAKE: To take the composition off line
- TRANSITION: To activate or deactivate the connection